Beaded Slave Bracelet
Periodically putting a larger bead of the same colour in a row of smaller beads can create very nice contrast.
Beading is a fairly portable craft, I often used to take it with me places. Those little fishing tackle containers with the dividers make good holders for keeping colours seperate. Plus you can just put your projects in an empty compartment, snap it shut, and go. I like to work with waxed thread when I bead, but you can also use beading needles as I have in this example. Some people work with different thread type stuff, like fishing line.
Materials
- Thread
- Beading Needles
- Short Beads
- Long Beads
- Clasp
- Scissors
- Fray Stop
Instructions
The first thing you need to do is cut two equal lengths of thread. Each one, when folded in half, should be able to go around your wrist six times.
(It is better to make it too long than too short, you can always cut off excess thread.)
Next you will need a clasp for the bracelet, they are available in many shapes and sizes (check your local bead or craft store). I like to use flat ones so they don't flip or roll while you wear them.

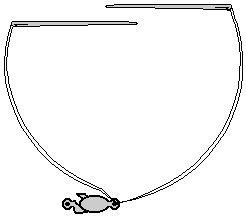
Put a beading needle on both threads and then knot both doubled threads through one side of the clasp as shown in example 1. (The thread in the drawing has been shortened to simplify it.)
Now it is time to start the beading. For this example I will be using dark blue, dark purple, and light purple beads but feel free to use any colors you'd like. You will need long beads in one color (![]() ) and small beads in two other colors (
) and small beads in two other colors (![]() ,
,![]() ).
).
On one side of the thread this pattern of beads:![]()
On the other side of the thread put these on:![]()

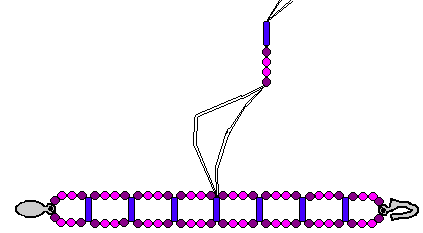
Take the needle that did not get a blue bead and put it through the blue bead on the other side as shown in the picture.

This means that both threads share the blue bead. Keep repeating this pattern until the bracelet is the right length to go around your wrist. Once you have the bracelet the right length tie the thread through the other side of the clasp. The bracelet part of your project is now complete, but don't cut off the thread.
Now it is time to thread your needles back through the top and bottom row of beads so that they come out in the middle of the bracelet. This part is a little bit tricky if your beads have small centers. You might have to cut the threads and tie them on again in the middle of the bracelet.

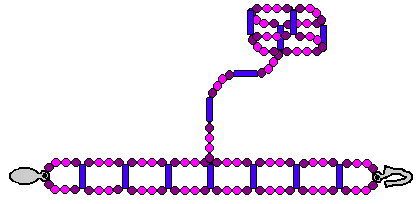
Once the threads are coming out of the same bead in the middle of your bracelet, put both needles through a simple string of beads as shown in the picture. This makes up the chain that holds the ring on. You can also thread both needles through their own sets of beads if you would prefer two chains on your bracelet.
When you have a long enough chain, separate the two threads again so that one thread comes out on either side of the long bead.
On one side of the thread this pattern of beads:![]()
On the other side of the thread put these on:![]()
This is the start of the same pattern as the bracelet. Once you have the ring size needed, thread one needle back through the very first blue bead of the ring. This should put both threads on the same side of the bracelet.
Tie the threads together and put Fray Stop or a similar product on your knots to keep them together. Cut off any excess thread and your finished!


